Learning Chef From Scratch - Building a EC2 Backed Rails Stack Part 1
Setup Chef and Creating a EC2 instance
Chef is a fantastic tool for automating the process bootstrapping a fresh server so that once you have got it running how you want, replicating that configuration and setup requires very little effort what so ever.
Chef has two different use cases, Chef server (wether that be hosted or private) or Chef Solo. Chef solo allows you to interact directly with the machine your wanting to administrate and is very useful for bootstrapping a vagrant image for instance. Chef Server offers a centralised place for you to push your configurations and recipes so that when working with multiple servers (known as nodes or chef clients) you don’t have to update each one individually as each client can be set to poll to server for any updates.
For my first time using chef i through myself straight in at the deep end in that i wanted to put together a full working EC2 instance that would run my usual heroku stack (nginx, unicorn, ruby, rails and postgres). I opted for using Opscodes free Chef hosted plan for my Chef server and got straight to it.
Getting Set Up
First of head over to www.opscode.com and sign up for a free account. There will be three files to download. Your user key, your organisation key and your preconfigured knife.rb file. Download these files and keep them safe for now, we will use them in just a second.
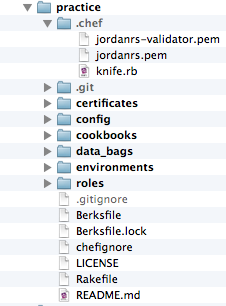
Next we need to get our bootstrapped Chef Repository, this is our blank slate to begin building up our server and its configuration. Grab a empty Chef Repo from opscodes git hub and clone it to where ever you desire.
1
| |
Next we need to move our .pem and knife.rb files into a .chef folder in this repository. You will most likely have to make the .chef folder.
Gem Time
Now we have our directory structure in place we should install the gems we need to make the magic happen. A complete guide to setting up chef can be found here as I wont go into the details of installing ruby, rvm, bundler etc to enable the installation of gems.
The main gems needed are the chef and knife-ec2 gems.
1 2 | |
Creating a EC2 instance with knife
A few prerequisites are needed before we can create instances with knife. First you will need a AWS account which is free and comes with a free usage tier for the first year. Once setup you will need to include your amazon API key and secret into your knife.rb file
1 2 | |
Next set up your default security policy or an alternative one which we can specify when creating the instance, to allow access to port 22, 80 and 443. This is so HTTP, HTTPS and SSH can all be accessed on the created instance.
In the same dashboard go to key pairs panel and create a new security key. The file will automatically download and should be moved into your ~/.ssh folder and the permissions changed to 600 (chmod 600 ~/.ssh/AWS-KEY.pem)
Finally decided what operating system, location, storage and instance size you want. All of these factor into which AMI will be installed on our instance. For instance this site put together by ubuntu gives you a list of all the different AMIs for the numerous combination of these factors with ubuntu as your base OS.
In my case i went for ami-7962730d which is a eu-west 32bit version of Ubuntu 12.04 for a micro instance.
We are now ready to create our instance using knife, the command to do that is quite large but I shall show you a few things you can move into the knife folder as defaults to make it more manageable
1 2 3 | |
If you chose a different security group other than the default you can specify it here with the -G ‘group’ argument and the —ssh-user argument is ubuntu as that is the default user that comes with the AMI and is needed for us to be able to ssh in with.
All that happens now is a new instance is created and the OS is installed once complete chef automatically SSHs in to the new machine and install chef-client on the server, registers it on on chef server and checks to see if we have specified any roles or recipes, in this instance we haven’t.
Shortening the creation command
Add the AWS-KEY.pem to your ssh agent means you can remove the -i ~/.ssh/AWS-KEY.pem from the command
1 2 3 4 | |
Add knife[:aws_ssh_key_id] = "AWS-KEY" to knife.rb and we can remove -S knife
1
| |
And finally add availability_zone and region to knife.rb
1 2 | |
to produce the final command
1
| |
After all its installation is done you should see a read out like so, make a note of the Instance ID as this is what chef uses to identify this node.
1 2 3 4 5 6 7 8 9 10 11 12 13 14 15 16 17 | |
So now we have a node/client associated with our chef server we can begin building up our cookbooks to install our stack which i shall cover in Part 2.